Do you dread cleaning your kitchen because it feels like an overwhelming task? Do you avoid it altogether until it becomes a huge mess? If so, you’re not alone. Many people struggle with finding the motivation to clean their kitchen. However, with a simple 10-minute cleaning routine, you can keep your kitchen clean and organized without feeling daunted.

In this article, we’ll share a 7-step cleaning routine that can be completed in 10 minutes. Following these steps, you can keep your kitchen clean and tidy daily without spending hours cleaning. Some days you must spend more time cleaning if you have a messy kitchen. Or if your sink is full of dishes, you may have to spend more time doing dishes. If you stick to the cleaning routine, you will become efficient and not take much time.
Whether you’re a busy parent, a working professional, or dislike cleaning, this routine is perfect. So, let’s get started!
Step 1: Clear the Countertops
The first step in your 10-minute kitchen cleaning routine is to clear the countertops. This will give you a clean surface to work with and make cleaning the rest of your kitchen easier.
To start, remove any items that don’t belong on the countertops. This could include dishes, appliances, and other clutter. Put these items away in their proper place or the dishwasher if they need to be cleaned.
Next, wipe down the countertops with a damp cloth or sponge. This will remove any crumbs, spills, or other debris that may have accumulated. Be sure to get into all the corners and edges of the countertops.
You may need a cleaning solution if you have any stubborn stains or spills. Mixing water and vinegar in a spray bottle can make your cleaning solution. Spray the solution onto the stain and let it sit for a few minutes before wiping it away with a cloth.
Finally, take a few seconds to organize the items that belong on the countertops. This will make it easier to find what you need when you’re cooking or cleaning.
Following these simple steps, you can quickly and easily clear your countertops and prepare your kitchen for the rest of your cleaning routine.
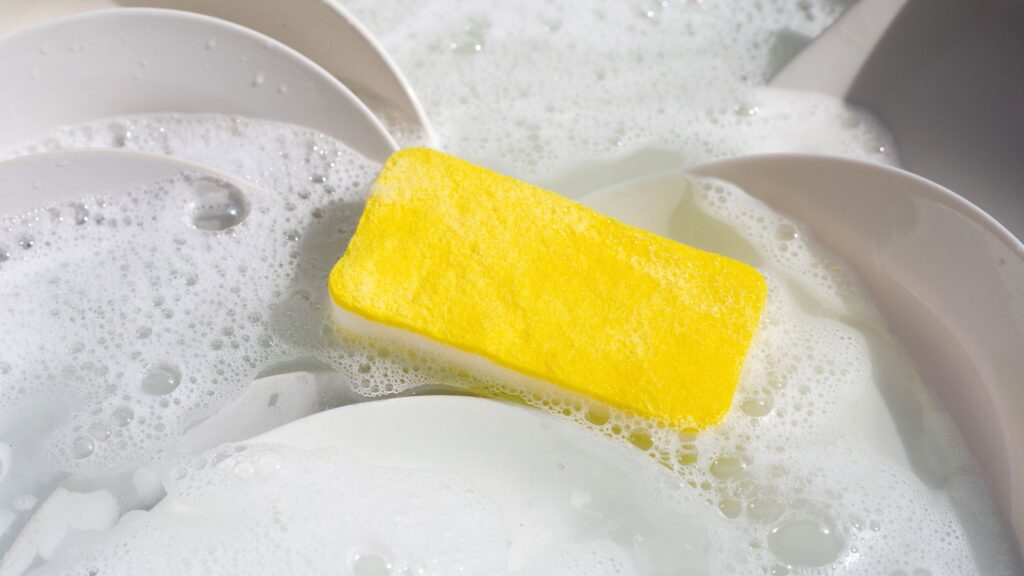
Step 2: Soak the Dishes
After clearing the countertops, it’s time to tackle the dishes. The easiest way to clean dishes is to soak them first. This will help loosen up any stuck-on food and grease, making it easier to wash them.
First, scrape off any leftover food from the dishes and utensils. Then, fill up your sink with hot soapy water. Use a large basin or tub if you don’t have a sink. Add a few drops of dish soap to the water and mix it well.
Place the dirty dishes and utensils into the soapy water, making sure they are completely submerged. Let them soak for at least 5 minutes. Let the dishes soak for up to 30 minutes if they are particularly dirty.
While the dishes are soaking, use this time to clean other kitchen areas, such as wiping down the stovetop or cleaning the microwave.
After soaking the dishes, use a scrub brush or sponge to clean them. Start with the least dirty dishes first, up to the dirtiest. Rinse each dish with hot water and dry it in a dish rack.
By soaking the dishes, you’ll save time and energy when scrubbing them clean. Plus, it’s a great way to prevent food from getting stuck, making it harder to clean later.
Step 3: Wipe Down the Stovetop
After removing the grates and burner caps is time to wipe down the stovetop. This is an essential step in any kitchen cleaning routine, as the stovetop is often the messiest part of the kitchen. Here’s how to do it:
- First, use a scraper or spatula to remove large pieces of food or debris from the stovetop. Be careful not to scratch the surface.
- Next, use a damp cloth or sponge to wipe down the stovetop. Use a mild dish soap if necessary, but rinse thoroughly with water afterward.
- You may need a specialized cleaner for tougher stains or grease buildup. Check the manufacturer’s instructions to ensure the cleaner is safe for your stovetop surface.
- If you have a gas stovetop, clean the burner heads and ports. Use a toothbrush or other small brush to remove any debris or buildup.
- Once you’ve finished cleaning the stovetop, dry it thoroughly with a clean cloth or paper towel.
- Finally, replace the grates and burner caps, and your stovetop will be ready to use again.
Following these simple steps, you can keep your stovetop looking clean and shiny and ensure it functions properly for years.
Step 4: Clean the Appliances
Cleaning the appliances in your kitchen is an integral part of your 10-minute kitchen cleaning routine. Appliances like your stove, microwave, and refrigerator can accumulate a lot of dirt and grime over time, so cleaning them regularly is essential to keep your kitchen looking and smelling fresh.
To clean your appliances, follow these steps:
- Stove: Wipe your stove with a damp cloth to remove any loose debris. Then, spray a stove cleaner onto the surface and let it sit for a few minutes. Use a scrub brush to remove any tough stains, and then clean the surface with a damp cloth.
- Microwave: Fill a microwave-safe bowl with water and add a few slices of lemon or two tablespoons of vinegar. Microwave the bowl for 3-5 minutes, or until the water boils and the steam has loosened any stuck-on food. Carefully remove the bowl and wipe down the inside of the microwave with a damp cloth.
- Refrigerator: Start by removing any old or expired food from your fridge. Then, wipe down the shelves and drawers with a damp cloth. For tough stains or spills, use baking soda and water to scrub them away. Finally, wipe down the exterior of the fridge with a damp cloth.
- Dishwasher: Run your dishwasher through a cycle with a dishwasher cleaner. This will help remove any built-up grime and keep your dishwasher smelling fresh.
- Toaster: Unplug your toaster and remove the crumb tray. Dump out any crumbs and wipe down the tray with a damp cloth. Use a pastry brush to remove crumbs stuck inside the toaster slots.
- Blender: Fill your blender with warm water and a drop of dish soap. Run the blender for a few seconds to clean the blades and the inside of the blender. Then, rinse it out with warm water.
- Coffee Maker: Fill your coffee maker with equal parts water and vinegar. Run the coffee maker through a cycle, then run another cycle with water to rinse it out.
By following these steps, you can quickly and easily clean the appliances in your kitchen as part of your 10-minute kitchen cleaning routine.
Step 5: Scrub the Sink
Now that you have cleared the countertops, it’s time to move on to the sink. The sink is one of the most used areas in the kitchen, and it’s essential to keep it clean to prevent the growth of bacteria.
To start, remove any dishes or debris from the sink. If there are any stubborn stains or food particles, use a scrub brush or sponge to remove them. You can also use baking soda and water to create a paste to help remove tough stains.
Next, apply a small amount of dish soap to the sink and use a scrub brush or sponge to clean the entire sink, including the sides and bottom. Be sure to pay extra attention to the drain and faucet areas, as these can often harbor bacteria.
Once thoroughly scrubbed the sink, rinse it with warm water and dry it with a clean towel. If you have a stainless steel sink, use a microfiber cloth to buff out any water spots and give it a shiny finish.
Pro Tip: To keep your sink looking and smelling fresh, pour a cup of white vinegar down the drain and let it sit for a few minutes before rinsing it with hot water. This will help eliminate any odors and keep your sink smelling clean.

Step 6: Sweep and Mop the Floor
After cleaning the countertops, stove, and sink, it’s time to sweep and mop the floor. This is essential to ensure your kitchen is sparkling clean and free of dirt or grime.
First, grab a broom and sweep the floor. Ensure to get into all the corners and under any appliances or furniture. Use a dustpan to collect and dispose of the dirt and debris in the trash.
Next, fill a bucket with warm water and a cleaning solution. You can use a store-bought cleaner or use vinegar and water. Dip a mop into the solution and wring out any excess water.
Starting at the farthest corner of the room, begin mopping the floor in a back-and-forth motion. Make sure to overlap each stroke to cover the entire floor. If you come across any tough stains or spills, use a scrub brush to remove them.
Once you have mopped the entire floor, rinse the mop in clean water and wring out any excess water. Then, go over the floor again to remove any remaining cleaning solution. Finally, let the floor air dry or use a clean towel to dry it off.
Following these simple steps, you can keep your kitchen floor clean and hygienic. It only takes a few minutes, but it can make a big difference in the overall cleanliness of your kitchen.
Step 7: Take Out the Trash
Now that you have cleaned your kitchen, it’s time to take out the trash. This is an essential step in maintaining a clean and hygienic kitchen. Here are a few things to keep in mind when taking out the trash:
- Tie the Trash Bag Securely: Make sure to tie the trash bag securely so it doesn’t spill or tear when carrying it out.
- Use a Garbage Can with a Lid: A garbage can with a lid will help keep odors and pests at bay. Make sure to close the lid after you have thrown the trash.
- Wash Your Hands: After taking out the trash, wash your hands thoroughly with soap and water to prevent the spread of germs.
- Clean the Garbage Can: Once you have emptied the trash, clean the garbage can. Use a disinfectant spray or wipe to clean the can and the lid.
- Replace the Trash Bag: After cleaning the garbage can, replace the trash bag with a new one. This will ensure that your kitchen stays clean and fresh.

Conclusion
Incorporating a 10-minute kitchen cleaning routine into your daily schedule can help you maintain a clean and organized kitchen without spending hours cleaning. Following the seven cleaning steps outlined in this article, you can ensure your kitchen stays clean and hygienic.
Remember to start by decluttering the counters and sink area, then wiping down surfaces and appliances. Don’t forget to clean the floors and take out the trash. By doing these tasks regularly, you can prevent the buildup of dirt and grime, making it easier to clean your kitchen in the long run.
Additionally, using the right cleaning products and tools for each task is essential. For example, use a disinfectant spray to clean surfaces that come into contact with food and a microfiber cloth to wipe down stainless steel appliances without leaving streaks.